

002 How I Build Healthy Garden Soil
In this episode, I’m going to take you through my decade long journey in building healthy soil in my garden.
002 How I Build Healthy Garden Soil
Development, Refinement, and Next Steps in My Garden
Written by Scott Gillespie
www.plantsdigsoil.com
Building healthy soil can be a long process of trial and error. Experimenting with ideas, observing results, and refining the plans are part of the process. In this podcast, I’m going to take you through my decade long journey in building healthy soil in my garden. While the process of learning on your own land is important, I hope that you can take away some practices that cut years off your learning and help you to reach your goal quicker.
Developing The Garden
When my wife and I moved into our house a little over a decade ago, there was a space at the back of my property that was surely meant to be a garden. It measured 7m x 7m, was fenced off from the rest of the yard, and had a small shed in one of the corners. The summer that we moved in was particularly dry, even for our area, and the space was a hard patch of ground. The previous owners had used the space to park their boat. It was so dry and so hard that even the weeds had a hard time growing.
I didn’t do anything with the area until the fall when I set up a compost bin. This was something I’d been looking forward to doing at my own house ever since a previous roommate had set up one in our rented house. She was an organic farmer and couldn’t stand just throwing out vegetable scraps when she could see their exceptional potential for compost! Her method was very simple, but slow – and it meant that she wouldn’t end up with a final compost for about two years. But patience pays off, because after those two years, she had a steady supply of finished compost ready to use in the garden.
I acquired some old pallets that I knew were not used for chemicals or other harmful products that I didn’t want in my compost. I started by making one bin to collect leaves in[1]. That fall, I went around the neighbourhood looking for bags of leaves that people left out at the curbside and picked them up.

Composting system. Bin 1 (leaves). Bin 2 (Fill bin). Bin 3 (First turn). Bin 4 (Finished Compost).
Another bin was made beside it to create the compost. I had a pail in the house lined with newspaper to collect all our kitchen scraps, and once a week, I’d put the scraps in the compost bin, add some water if needed, and put a layer of leaves over top. The advantage of starting in the fall is that the entire bin is free to fill over the winter. Decomposing typically continues through the fall, but a point comes when the microbes can’t generate enough heat and go dormant. In the spring, the pile usually shrinks to half its size and very slowly fills up again through the summer. Sometimes, it falls to the same level each week when decomposition is going rapidly.
After a year of weekly additions, it was time to make the third bin. The compost bin was turned into the third, the leaf bin was refilled, and the process started over again. The compost, at this point, was still very chunky. After another year, I built the fourth bin. Bin three was turned into the bin four, bin two was turned into bin three, the leaf bin was once again refilled and the process started again in bin two[2].
Now, I finally had finished compost (bin four) that was ready to be put into my garden. I used it throughout the following year, making sure to finish it off before the fall when I’d need the bin again.
Experimentation
In the first few years of growing my garden, I, more or less, played around. In fact, I don’t even remember a lot of what I did! I simply planted things wherever they fit and I watered entirely by hand. After a few years of doing this, I had a neighbour offer me a rototiller to use. For the next two years, nothing grew as good as those first few years. It seemed so counter-intuitive to conventional gardening wisdom. Tilling the soil should have made it better, but it made it worse.
I got to thinking that maybe all the work at bringing no-till to agricultural systems could be applied to gardening. While growing up on a farm, I had witnessed my Dad switch from plowing and tilling the land to leaving the crop residue in place and planting directly into it the following spring[3]. I knew it couldn’t be perfect – carrots, after all, can’t be no-till because you need to dig them out in the end – but I wanted to try.
I didn’t know it then, but the rototilling had broken up all the mycorrhizal fungi. These fungi are the underground network that provides plants with hard to access nutrients in exchange for sugars (energy) from the plant. These fungi also connect plants to each other, allowing them to make their own exchanges when one needs something the other has. It took years for them to re-establish the connections through the soil and be ready for new plants each year. I also probably killed a lot of my earthworms that were doing all of the natural tillage and residue breakdown for me.

Wood frames protecting seeds from the mulch
No-till doesn’t work the same way in a garden as it does in growing crops such as corn, soybeans, and wheat. Those crops leave a lot of residue after harvest, but most vegetable crops don’t leave much behind. For many years, I had been bringing a pickup truck-load of free wood chips from the town dump and putting them around my trees and perennial flower gardens. As an experiment one year, I tried them on my tomatoes, and I was amazed at the water savings. It surely meant that there’d be a lot less work for watering!
The next year, I tried covering the entire garden. Transplanting tomatoes worked fine in the mulch because I could just pull back a small area, dig a hole, plant the tomato, and push the wood chips back in place. I figured I could just do the same where I planted seeds, except that I’d leave the space open and only cover it again when the seedlings were established.
I tried doing this but I always found that the seeded area got covered again. I didn’t think the wind could push the mulch around and there hadn’t been any big rains. It was only when one day I noticed the birds scratching around that I discovered the problem. They were flicking things around looking for insects, and in the process, they covered my seedlings! The following year, I built small wood frames to protect them until they were big enough to grow through the mulch[4]. This turned out to be a viable solution. I’d struck upon a way to make no-till work in my garden using wood chips for residue and wooden frames to protect my developing seedlings.
Refining The System
Next, I looked at improving my irrigation system. I tried weeping hoses, pinhole hoses, and even regular hoses with holes drilled into them. It all worked well enough, but the wind moved them around, and they eventually became brittle from the sun.
I decided to go with a homemade PVC pipe system[5]. I wanted something rigid enough to ensure that it wouldn’t move, but I also wanted a system that could handle low-pressure water from my rain barrels. So far, this has worked well, although I have found that I need to level it nearly perfectly in order for it to be most effective and efficient. There are no pressure regulators in the emitters, so if one area is lower than the rest, then that area gets more water.
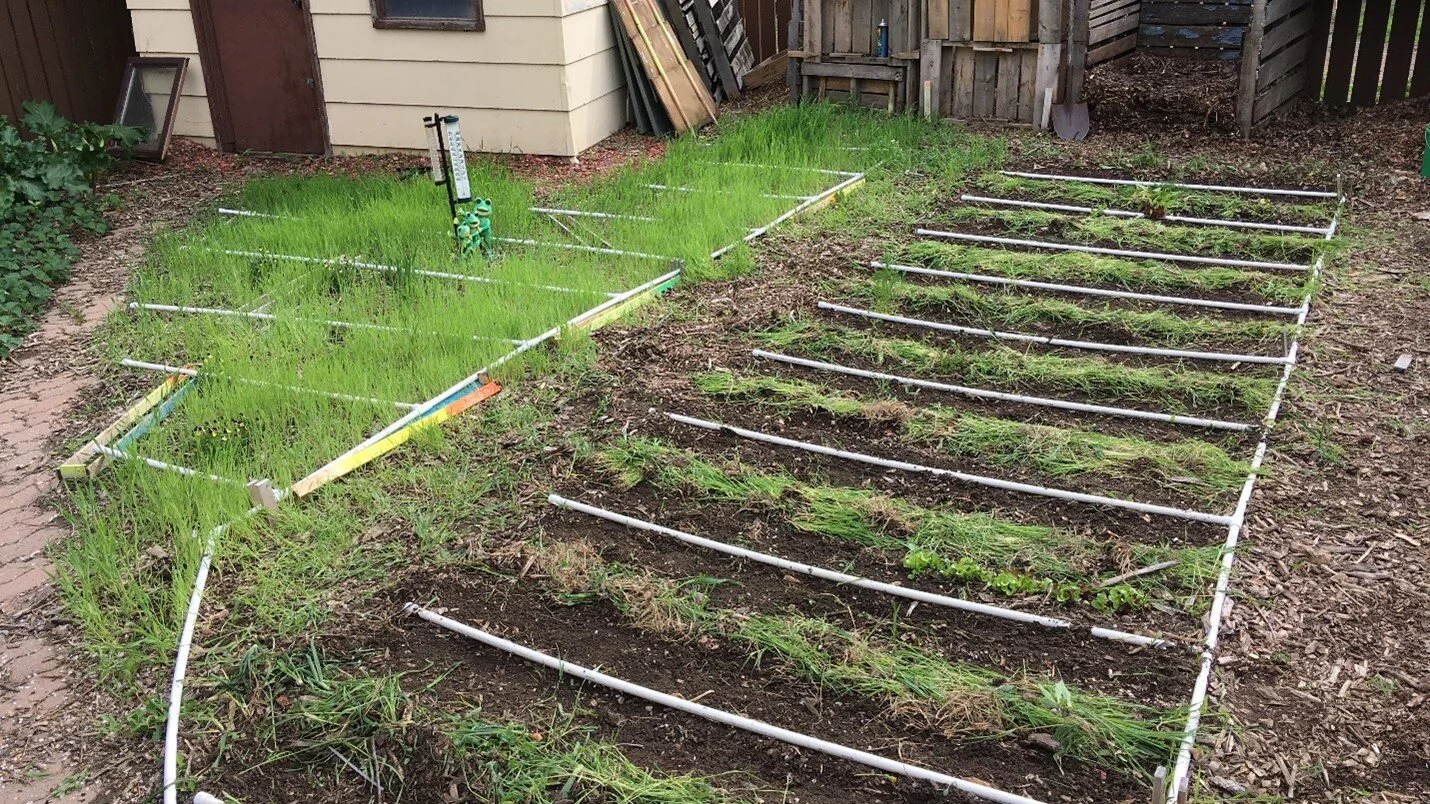
PVC drip irrigation system
The PVC system worked fine throughout the first few years that I had used it. For my area, normal precipitation is 230mm of rain in the growing season (April to September). This is about half of what a typical garden will need, but because I was collecting rainwater, I was able to double or triple the effectiveness of each rain. After an 8mm rain, my rain barrels are full, but I still need regular rains during the year.
When the dry years hit, my drip irrigation system simply couldn’t keep up. In 2017, our last rain was in early June.We only saw 20mm total from a few small rainstorms for the rest of the year. I had to supplement the drip system with an overhead sprinkler to keep up. After this experience, I redesigned it, so that the pipes were 60cm apart, with emitters every 30cm[6]. I planted my rows close to the pipe (10-20cm) to ensure that it closely resembles a twin-row with a larger space in between. It worked better in 2018, when a near similar event happened (no rain in July & August). I had to fill my rain barrels with municipal water, but the system still worked. This spring I drilled more holes so I have emitters 15cm apart. I hope by doing this I will not need an overhead sprinkler.
Up to this point, I had unintentionally integrated most of the soil health principles[7]. I say, “unintentionally,” because at the time I was doing this, I wasn’t aware of them[8]. First of all, I reduced and nearly eliminated tillage. Secondly, I provided soil cover at all times through the use of the wood mulch. Because it’s a garden with many plants, and because I was always rotating my crops around, I was following the third principle – maintaining a diversity of plants. The fourth principle – integrating animals – is likely never going to happen. I could get animal manure or composted animal manure, but I’m a firm believer that adding my own compost fits this principle. I don’t want to risk introducing a human pathogen into my vegetable patch. So, this leaves us with one more principle to apply – cover crops.
Cover Crop Integration.
I believe that integrating cover crops in my garden will allow me to grow vegetables without the wood mulch. Cover crops can provide the residue that I need to cover the soil surface, they can help control weeds, and they can work to build the soil while there aren’t any crops growing.Under the system that I have developed up until this point, I need to pull the wood mulch aside each time I transplant seedlings[9] and when I plant seeds. It also needs to be pulled aside whenever I harvest root crops, such as carrots and parsnips. Even pulling it back, some of the wood chips fall into the soil during the harvesting process. Wood mulch that gets incorporated into the soil can tie up nutrients for years until it releases nutrients back into the system. And while this is fine under trees and in my perennial flower gardens, I require a faster, more rapid release of nutrients in my vegetable garden.
When it comes to weed control, the wood mulch simply isn’t performing as well as I’d like it to. I can’t put on a thick layer (15-20cm) as I can in perennial areas, meaning the weeds can still push through.
For the past couple of years, I’ve been experimenting with cover crops that will produce enough biomass to smother the weeds and cover the soil while the vegetables establish themselves[10]. In the fall of 2017, I tried out fall rye within the wood mulch. I planted it very late (mid-October) and though it didn’t do much more than sprout in the fall, when the spring came it was poking into the snow as it melted. The biggest lesson I learned from it was to be careful to terminate if you get into a dry spring[11]. I’m fortunate that I have water to irrigate my garden, but when I went to plant the tomatoes into it, the soil was dry for 20-30cm down. I couldn’t deny that it didn’t do its job – there were no weeds. This was partly due to allelopathy, which is a plant releasing chemicals to inhibit plants from growing it near by, and partly due to the soil being dried out on the surface where the common weeds germinate. [12]
Last fall, which is 2018, I decided to pull all of the wood mulch off my garden. I was able to get some winter wheat planted after my onions, and fall rye planted after my tomatoes and pumpkins. I still need to work out the timing because there wasn’t much growth on the rye, though the winter wheat was doing well. I had some extra compost, so I put that over the fall rye area and was expecting it to hold the soil in place. It did well at first, until we had sustained winds for a day near 100km/hr! Even that blew away!
The wind is a reality where I live – we are only 200km from the Rocky Mountains and regularly get hot, dry winds, locally called “Chinooks,” that can blow for days at a time. Typically, the sustained winds are 30-50km/hr with 50-70km/hr gusts, but occasionally, they can go much higher. I think a combination of living plants above ground and compost to fill the gaps will work well.

Fall rye coming up under the snow
The main reason to get cover crops working in my garden is to reach a point where the plants can regenerate enough nutrients to replace what I take from the system. When the plants aren’t making me food, they are employing the microbes to mine the soil for nutrients and build soil aggregates. If it were a completely closed system, I wouldn’t be able to take a lot, but I am adding nutrients through the compost. While some of the compost comes from veggie scraps of plants grown in the garden, a large portion of it is leaves from neighbours and veggie scraps from produce that is bought at a store.
Increasing Diversity and Strategic Tillage
In addition to cover crops, I want even more plant diversity and so I’m planning to scatter my crops all over the garden, rather than putting them in rows. This way, there will be a diversity of crops within each square meter. For instance, I’m interested in putting my onions around my radishes to help control the flea beetles that attack them. It appears that this was the way pests were dealt with in the past, but this knowledge was nearly lost[13].

Garden plan 2019
I’m also planning to go back to a bit of tillage. I’m interested in trying it out because there has been success in using it in organic systems[14]. I’m not going to be going deep, but with the wood chips out of the way, I’m going to try cutting back the cover crops and any other weeds that are present just prior to planting to create a mulch on the surface. I can lay the plant residues between the rows to hold the moisture, protect the surface, and maybe stop some weeds from growing. From there, I’ll establish the edible crops near the drip line, and then I can keep the weeds down between the seedlings as they grow. Then, I’ll move the mulch there from the middle.
Once the mulch is moved to the vegetable crops, I’ll try to re-establish cover crops between the row. Depending on the neighbouring plant, the cover may sit mostly dormant until fall when it takes off. I may even need to cut it back occasionally. The ultimate goal throughout this process is to ensure that there is something growing in each area of the garden all through the summer and when the fall comes, there are things growing there as well. If I have leftover compost, I can lightly spread it on the surface around the cover crops. This will protect the soil all winter and help to keep it in place for the following spring when I cut it back to plant.
I’m not going to worry about following a strict crop rotation anymore. I’ll try to plant different groups of plants in different areas throughout the year, but I think the amount of space that I have and what I want to grow will be the main determinants. For example, if there are areas with very little cover crop come springtime due to late harvested crops from the previous year, I may plant my cool-season crops, such as lettuce or onions in those areas. If there’s lots of cover and I want to let it grow, I may do that and plan on planting the tomatoes or pumpkins there. They take while in the early summer to cover the ground, so having a living crop in place may help them.
Summary
In this podcast, I’ve covered the decade-long journey that I’ve had in restoring a piece of land and turning it into a productive garden. Adding homemade compost, not disturbing the soil, and keeping a layer of mulch on top helped to restore the soil. I’ve maintained the health of the soil by rotating my crops to different areas each year. Over this coming year, I want to relax my system a bit. I’m still going to be sure not to disturb the soil, but I’m going to try a little bit of tillage. I’m going to get away from rotating crops in blocksand move towards keeping a diverse set of plants in each area at any one time. I’m not sure exactly how this will work, but this is the fun of having my own garden! Failures don’t cost me money and successes gain me knowledge.
This podcast was originally published at:
https://www.scottcgillespie.com/posts/2019/5/28/how-i-build-healthy-garden-soil
It has since been moved to:
https://www.plantsdigsoil.com/podcast/002-how-i-build-healthy-garden-soil
[1] Scott Gillespie. 2016. Composting in the Winter.
https://medium.com/@scottcgillespie/composting-in-the-winter-6169fd52019c
[2] Scott Gillespie. 2016. Turning the Compost.
https://medium.com/invironment/turning-the-compost-6a6cec32efa2
[3] Scott Gillespie. 2018. Rethinking Soil.
https://medium.com/@scottcgillespie/rethinking-soil-7e7ad95ea9df
[4] Scott Gillespie. 2016. Planting seed in wood mulch.
https://medium.com/invironment/planting-seeds-in-wood-mulch-50e8eea25641
[5] Scott Gillespie. 2015. PVC Pipe Drip Irrigation.
https://medium.com/@scottcgillespie/pvc-pipe-drip-irrigation-9d6504ea75fc
[6] Scott Gillespie. 2017. Drip Irrigation Design 3.0
https://medium.com/@scottcgillespie/drip-irrigation-design-3-0-8429d312289d
[7] Scott Gillespie. 2018. Rethinking Soil.
https://medium.com/@scottcgillespie/rethinking-soil-7e7ad95ea9df
[8] For a good read check out any of the books by David R. Montgomery & Anne Biklé.
The Hidden Half of Nature follows a similar story of discovery that I had in my own garden.
https://www.dig2grow.com/books
[9] Scott Gillespie. 2016. Transplanting into wood mulch.
https://medium.com/invironment/transplanting-into-wood-mulch-f76356792aa3
[10] Scott Gillespie. 2018. Grow your own mulch.
https://medium.com/@scottcgillespie/grow-your-own-mulch-4ebd8e9ce6a5
[11] Scott Gillespie. 2018. Cover crop lessons.
https://medium.com/@scottcgillespie/cover-crop-lessons-d3c584bfa093
[12] Scott Gillespie. 2018. Planting into a green cover crop.
https://medium.com/@scottcgillespie/planting-into-a-green-cover-crop-1e13f7867ec7
[13] Two Branches Homestead. 2018. Planting onions to save your greens and cabbage.
https://twobrancheshomestead.com/2018/01/23/planting-onions-to-save-your-greens-and-cabbage/
[14] Joel Gruver & Michelle Wander. 2018. Use of Tillage in Organic Farming Systems: The Basics
https://articles.extension.org/pages/18634/use-of-tillage-in-organic-farming-systems:-the-basics